Keep Your Axolotls Healthy Without the Constant Tank Maintenance
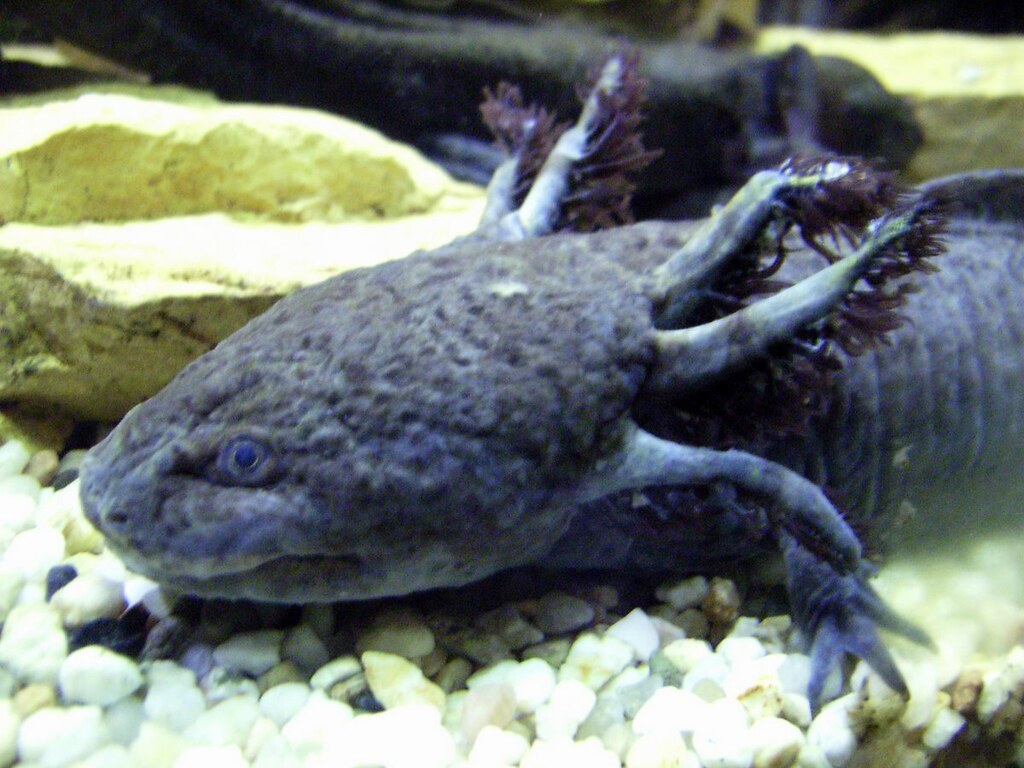
It’s a Tuesday evening, around 7:30 PM, and you’re standing in front of your axolotl’s tank with a gravel vacuum in one hand and a bucket of dechlorinated water in the other — again. You did this four days ago. The water is already cloudy, the ammonia test strip is turning that faint yellow-green that makes your stomach drop, and your axolotl, Noodle, is sitting at the bottom looking vaguely unhappy. You love this animal. You genuinely do. But you’re starting to wonder if the tank runs you instead of the other way around.
Here’s the thing most beginner axolotl guides won’t tell you: the problem isn’t that you’re being lazy about maintenance. The problem is that your tank was never set up to be stable in the first place. Constant water changes aren’t a routine — they’re a symptom. When your nitrogen cycle is solid, your filtration is right-sized, and your tank parameters actually stay in range between sessions, you stop reacting to emergencies and start doing light, predictable upkeep. That shift — from firefighting to actual husbandry — is what this guide is about.
1. The Nitrogen Cycle Is the Foundation, Not an Optional Advanced Topic
A fully cycled tank isn’t a bonus feature for experienced hobbyists. It’s the difference between changing water every two days and changing it once a week. The cycle works like this: beneficial bacteria colonize your filter media, converting toxic ammonia (from waste and uneaten food) into nitrite, then into the far less dangerous nitrate. That process takes roughly four to six weeks to establish from scratch — and it cannot be rushed by just adding fish or axolotls early.
A lot of people skip this step or half-do it, then wonder why they’re doing emergency water changes indefinitely. I kept a barely-cycled tank for almost eight months before I understood what was actually wrong. Ammonia was spiking every few days because the bacteria colony was too small to handle the bioload. Once I did a proper fishless cycle — using pure ammonia drops to feed the bacteria before adding any animals — the tank stabilized within two weeks of introducing my axolotl. Water changes dropped from three times a week to once.
Test your water with a liquid test kit, not strips. API’s Master Test Kit is widely available at most pet retailers and gives you reliable readings for ammonia, nitrite, nitrate, and pH. Strips are convenient but notoriously inconsistent — especially for ammonia — and a bad reading in the wrong direction can cost you an animal.
2. Filtration: Gentle Flow, High Capacity
Axolotls are not fish. They have delicate external gills that can be damaged or stressed by high-velocity water flow, and they spend a lot of time resting on the substrate. A filter that’s technically rated for your tank size might still create too much surface turbulence or direct current for an axolotl to be comfortable.
The approach that works: choose a filter rated for at least 1.5 to 2 times your actual tank volume, then baffle the output to reduce flow. A simple baffle — a plastic bottle cut and placed over the outlet, or a piece of sponge over the spray bar — dramatically disperses the current without reducing filtration capacity. You get the biological efficiency of a larger filter without blasting your animal against the glass.
Canister filters are popular for axolotl setups in the 20-to-40-gallon range because they sit outside the tank, hold a significant volume of filter media, and allow you to customize what goes inside. Sponge filters work well for smaller quarantine tanks or as supplemental filtration. Hang-on-back filters can work, but they need baffling almost universally.
One number worth keeping in mind: nitrate levels should stay below 40 ppm between water changes, with many experienced keepers preferring to stay under 20 ppm. If you’re hitting 40 ppm in three days, your filter isn’t doing enough biological work — or you’re overfeeding.
3. Temperature Is the Variable Most People Underestimate
Axolotls are cold-water animals. Their preferred range is roughly 60°F to 68°F (16°C to 20°C), with brief excursions up to around 72°F tolerable for short periods. Above 75°F, they become stressed, stop eating, and become susceptible to fungal and bacterial infections. Above 80°F, you’re looking at a genuine medical emergency.
In most American homes, especially during summer in states like Texas, Florida, or anywhere east of the Rockies in July, room temperature alone can push a tank into the danger zone. An aquarium chiller is not a luxury item if you live somewhere warm — it’s part of the basic setup cost. Small chillers designed for aquariums in the 20-to-50-gallon range are available through aquarium specialty retailers and online, typically in the $150 to $350 range depending on capacity.
If a chiller isn’t in the budget yet, the stopgap approach is: place the tank in the coolest room in your house, keep it away from direct sunlight and heat vents, and use frozen water bottles (sealed in a plastic bag to prevent condensation from affecting salinity or chemistry) placed in the tank temporarily during heat waves. It’s not elegant, but it works as a bridge.
4. Feeding Without Creating a Mess That Tanks Your Water Quality
Axolotls are opportunistic predators that will try to eat almost anything that moves in front of them — including gravel, which is how a lot of animals end up with impaction. The safest substrate choice is either bare-bottom (easiest to clean, though some axolotls seem to dislike the lack of traction) or coarse sand with grain size larger than their mouth opening.
Earthworms — specifically nightcrawlers from bait shops — are about the closest thing to a perfect staple food for axolotls. They’re high in protein, easy to digest, and don’t foul water the way some pellet foods do if they go uneaten. Hikari Sinking Carnivore Pellets are a commonly used commercial option that holds together reasonably well and sinks, which suits axolotls’ bottom-feeding behavior. Bloodworms are fine as an occasional treat but shouldn’t be a primary food source — they’re low in nutritional value and high in mess.
Feed two to three times per week for adult axolotls, not daily. Remove any uneaten food within two hours using a turkey baster — it’s the single most effective tool for spot-cleaning a tank between water changes. Overfeeding is one of the top drivers of poor water quality in axolotl tanks, and it’s entirely preventable.
5. What a Realistic Weekly Maintenance Routine Actually Looks Like
Here’s what a stable axolotl tank routine actually looks like — not the idealized version, but the real one, including the days it doesn’t go perfectly.
Monday: Quick visual check. Axolotl active? Gills full and feathery? No unusual spots or patches? Takes about 90 seconds. Feed earthworms, remove anything uneaten after an hour.
Wednesday: Feed again. Test water — ammonia, nitrite, nitrate, pH. If nitrates are under 20 ppm, nothing else needed. If they’re pushing 30, note it for the weekend change.
Saturday: 20 to 25% water change. Siphon the substrate lightly with a gravel vacuum to pull up waste, refill with temperature-matched, dechlorinated water. Total time: about 25 minutes for a 30-gallon tank.
The week this routine broke down for me was during a heat wave in late July. The chiller I had wasn’t keeping up, the axolotl went off food, and the ammonia crept up faster than usual because she was stressed and shedding more mucus than normal. I had to do two extra partial changes that week. It happens. The goal of a stable system isn’t that nothing ever goes wrong — it’s that problems are smaller and easier to address when they do.
6. What Doesn’t Work: Common Approaches That Waste Your Time and Stress Your Animal
Let’s be direct about a few things the axolotl internet loves to recommend that either don’t work or actively make things harder.
- Daily water changes as a permanent strategy. Some guides recommend changing 10% of the water daily as a routine. This is a band-aid for an uncycled or undersized tank. It also disrupts the bacterial colony you’re trying to build. Fix the root cause instead.
- Aquarium salt as a general health supplement. Axolotls are freshwater animals. Salt can be used in very specific therapeutic situations — treating fungal infections or osmotic stress — but adding it routinely to the tank doesn’t benefit them and can cause long-term issues with osmoregulation. Skip it as a default.
- Gravel substrate “because it looks natural.” Fine gravel is the most common cause of axolotl impaction. They ingest it while feeding, and it can block the digestive tract. It looks pretty. It also kills animals. Use sand or go bare-bottom.
- Keeping axolotls with fish. Even “peaceful” fish will nip at axolotl gills. The gills are external and exposed, and any tankmate that can fit a piece of gill in its mouth eventually will. Axolotls do best alone or with other axolotls of similar size.
7. The Refrigerator Method: When Your Tank Needs an Emergency Reset
If your axolotl develops a fungal infection — visible as white, cotton-like tufts on the gills or body — the refrigerator method is a legitimate short-term intervention used by experienced keepers and some veterinary sources. The idea is simple: move the axolotl to a small container of clean, dechlorinated water and keep it in a refrigerator set to around 40°F to 50°F. The cold slows the fungal growth and gives the animal’s immune system a chance to respond.
Change the water in the container daily, keep the animal in the fridge for three to seven days depending on improvement, and treat the main tank in the meantime. This isn’t a replacement for veterinary care if the infection is severe, but for early-stage fungal issues, it’s remarkably effective. A small plastic storage container with a loose-fitting lid (for gas exchange) works fine — no filter needed for a short-term stay.
Start Here This Week
You don’t need to overhaul everything at once. Three small moves that will meaningfully change how your tank behaves:
First, buy a liquid test kit if you don’t have one, and test your water today. Just knowing your actual ammonia and nitrate numbers tells you what problem you’re actually solving.
Second, cut your feeding to every other day if you’ve been feeding daily, and start using a turkey baster to remove uneaten food within two hours. Watch your water quality numbers over the next week. Most people are surprised by how much this single change improves things.
Third, check your tank temperature right now — not the room temperature, the actual water temperature with an aquarium thermometer. If it’s above 68°F and summer is coming, start planning for how you’ll manage heat. That decision is much easier to make in May than in August at 11 PM when your axolotl is at the surface gasping.
Publicar comentário